I need to confess something. Three years ago, I was the person standing in a café drive-through at 7:15 every single morning, handing over six dollars for a latte that tasted vaguely of cardboard and regret. My kitchen counter had a drip coffee maker I’d inherited from my mother and a jar of instant coffee “for emergencies.” The idea of pulling my own espresso shot felt about as realistic as baking croissants from scratch — lovely in theory, not happening in my kitchen.
Then my aunt visited for a week, watched me spend forty-two dollars on coffee in five days, and said the words that changed my mornings forever: “You know, your grandmother would have built a whole room around what you’re spending on coffee.” She was right. Grandma could stretch a dollar until it sang, and she never would have tolerated a daily café tax when a perfectly glorious espresso could be made at home.
That weekend, I started researching. Three months later, I pulled my first shot. It was terrible — sour, under-extracted, and oddly beige. But something about the process hooked me. The ritual. The smell. The way a perfectly dialed-in shot of espresso tastes like liquid chocolate and warm earth. I was converted, and there was no going back to drive-through coffee.
If you’ve been flirting with the idea of a home espresso setup — whether you’re tired of café prices, want better coffee, or just crave the satisfaction of making something beautiful with your hands every morning — I’m going to walk you through everything I’ve learned. No pretension. No barista snobbery. Just real-world experience from someone who made every mistake so you don’t have to.
The Machine: Where Real People Should Actually Start
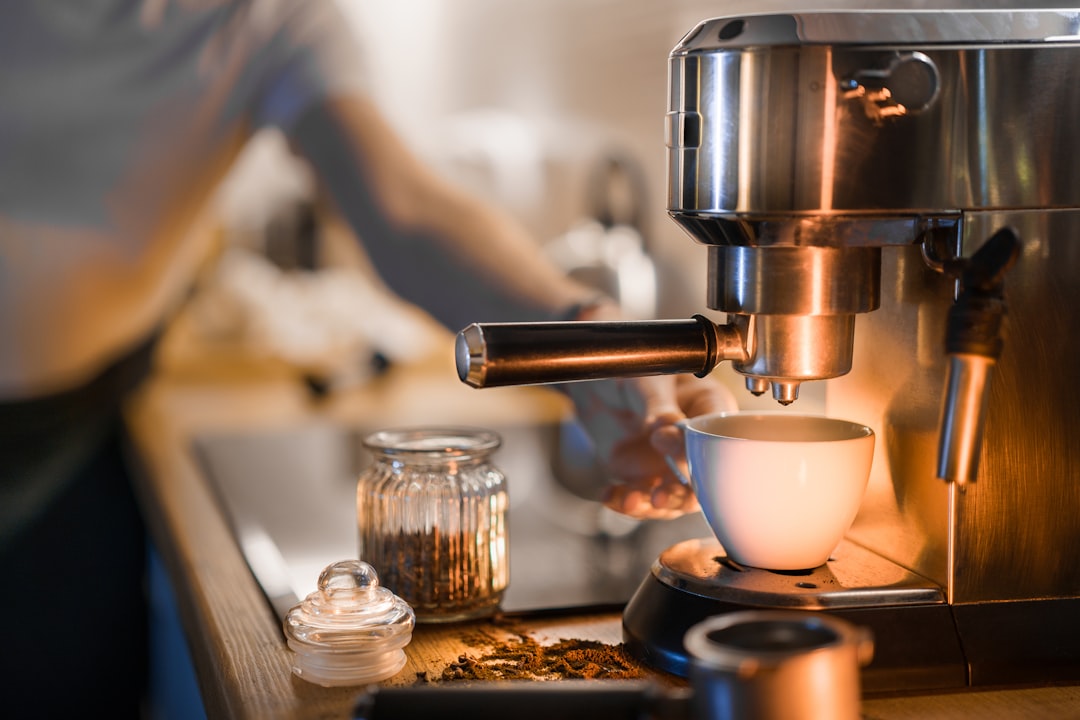
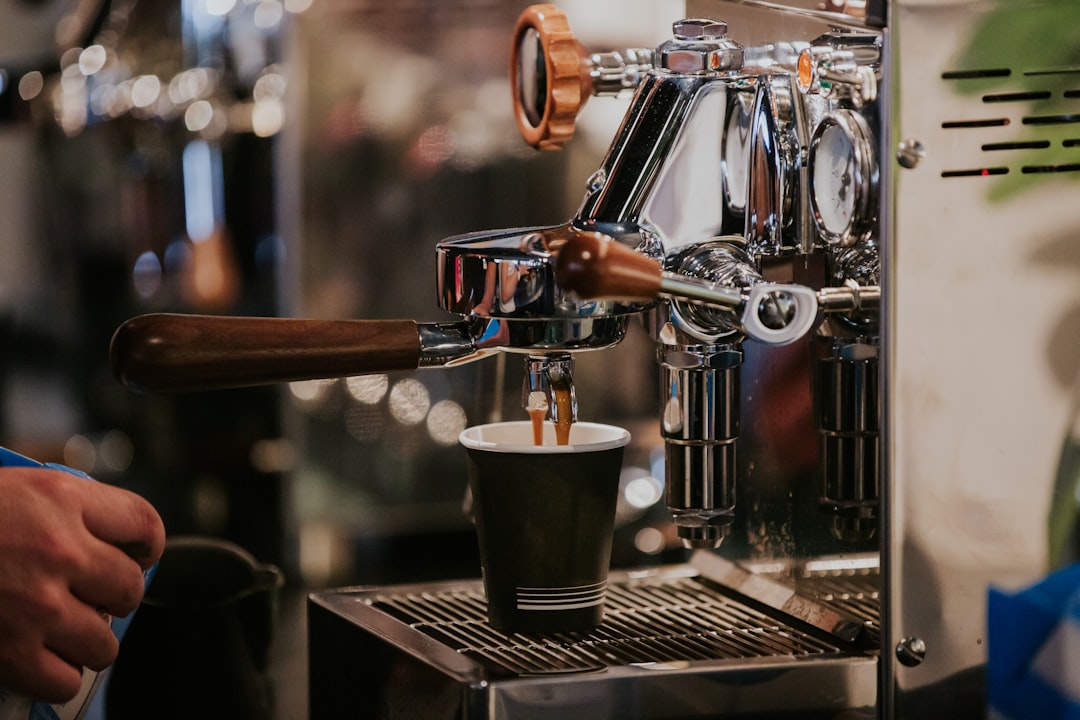
Let’s get this out of the way: espresso machines run the gamut from “surprisingly affordable” to “more than my first car.” The good news is that the sweet spot for most home baristas sits between $300 and $800, and that range will get you a machine capable of producing shots that rival or beat your local café.
I started with the De’Longhi Stilosa — a compact, no-frills machine that cost less than what I was spending on coffee in a month. It has a real 15-bar pump, takes up almost no counter space, and comes with everything you need to pull a respectable shot and steam milk. Is it the machine I use now? No. But it taught me the fundamentals — pressure, timing, temperature — without a steep learning curve or a steep price tag. For anyone who’s just curious whether home espresso is for them, this is where I’d point you first.
When I was ready to upgrade, I spent weeks comparing machines and landed on the Breville Bambino Plus. This little machine is the one I recommend to every friend who asks me “what should I buy?” It heats up in three seconds (yes, three), has genuine PID temperature control so your water is actually the right temperature every time, and the auto-steam wand makes microfoam so good you’ll want to practice latte art at 6 AM. It’s compact enough for a small kitchen but serious enough that I used mine daily for over two years without a single issue.
If you want the full experience — grinding, tamping, extraction — all in one footprint, the Breville Barista Express is the machine I watched transform my neighbor from a Keurig loyalist into someone who texts me photos of her crema. It has a built-in conical burr grinder, which means you don’t need to buy a separate grinder (more on that in a minute). The dose is adjustable, the steam wand is powerful, and the whole thing has a satisfying, solid feel that says “this is a real appliance.” For most people who know they want to commit, this is the one.
For those who want café-level quality without the café learning curve, the De’Longhi La Specialista Opera brings features that used to require a $2,000 machine: cold brew capability, smart tamping, and a built-in grinder with genuinely impressive consistency. It’s the machine I dream about on the days when my routine feels rushed.
And don’t overlook brands like CASABREWS — their CM5418 compact espresso machine has earned a loyal following among budget-conscious home baristas. A 20-bar Italian pump, stainless steel build, and a steam wand that punches well above its price point. I gifted one to my sister last Christmas, and she’s been making cappuccinos every morning since.
The Grinder: The Unspoken Hero of Great Espresso
Here’s the truth nobody tells you when you start: your grinder matters more than your machine. I know that sounds backwards. But espresso requires a remarkably precise grind — finer than table salt, consistent in particle size, and adjustable enough to fine-tune your shot. A great machine paired with a mediocre grinder will give you mediocre espresso. A mediocre machine paired with a great grinder will still give you something worth drinking.
If your machine doesn’t have a built-in grinder (like the Bambino or the Stilosa), budget for one separately. I used the SHARDOR conical burr grinder for my first year, and it handled espresso grinding admirably for the price. The timer-based dosing takes the guesswork out of how much to grind, and the burr mechanism (as opposed to a blade) is non-negotiable for espresso — blade grinders create uneven particles that make consistent extraction impossible.
My grandmother used a hand-crank grinder that she’d had since the 1970s, and honestly? Some days I think she had the right idea. A quality burr grinder — electric or manual — is the single biggest upgrade you can make after the machine itself.
The Accessories That Actually Matter (And the Ones That Don’t)
Once you have a machine and a grinder, the accessory rabbit hole opens wide. Let me save you some money and tell you exactly what matters.
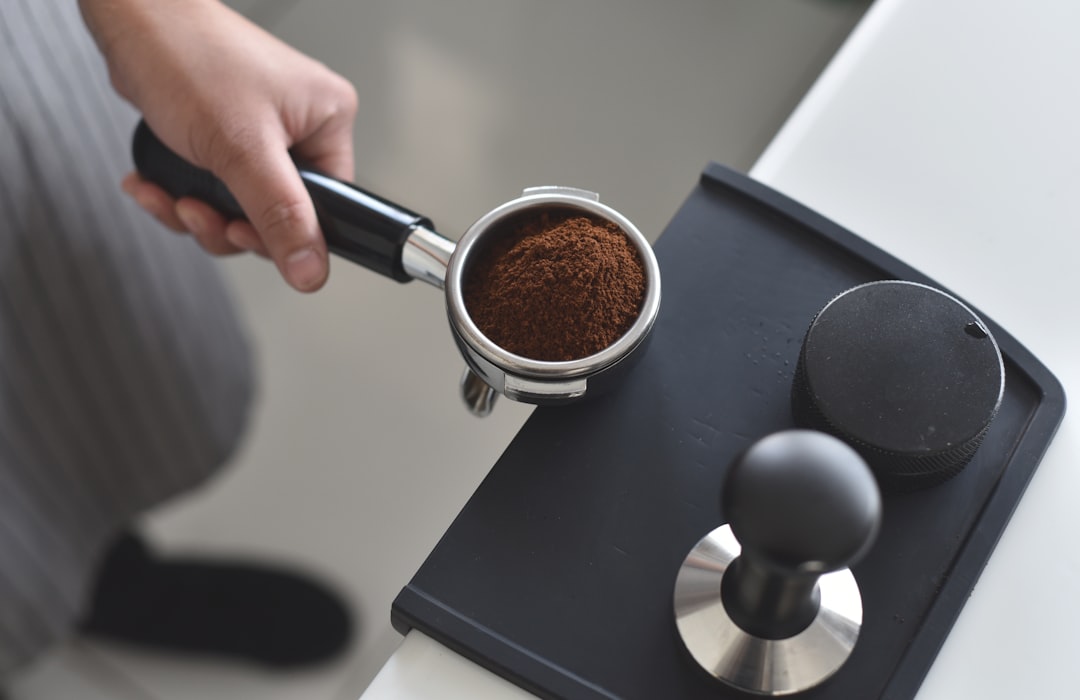
A Good Tamper
The tamper that comes with most machines is a flimsy afterthought. Upgrading to a properly weighted tamper changed my shots overnight. I use the Normcore V4 spring-loaded tamper, which applies consistent pressure every single time — no guessing, no uneven puck, no channeling. The spring mechanism clicks when you’ve pressed hard enough, which means even on groggy mornings when I’m barely conscious, my tamp is consistent. If you buy one accessory, make it this.
The WDT Tool (Yes, It Sounds Gimmicky. It Isn’t.)
WDT stands for “Weiss Distribution Technique,” and it sounds like something invented by a coffee scientist with too much time. In practice, it’s a tiny tool with ultra-fine needles that you stir through your coffee grounds before tamping. This breaks up clumps and distributes the coffee evenly, which prevents channeling — the thing that makes your shot taste thin and sour. The WDT distribution tool I bought cost less than fifteen dollars and improved my shot quality more than any other single change. I was skeptical too. Now I won’t pull a shot without it.
A Precision Scale
You cannot make consistently good espresso without a scale. I tried winging it for months — measuring by volume, timing by feel — and the results were all over the map. A precision coffee scale that measures to 0.1 grams and has a built-in timer changed everything. I dose 18 grams in, aim for 36 grams out, in about 28 seconds. Once I locked in those numbers, my shots went from “sometimes great, sometimes awful” to “consistently the best coffee I’ve ever had.” If you already own a kitchen scale, great — but if it doesn’t measure to the tenth of a gram, treat yourself to one that does.
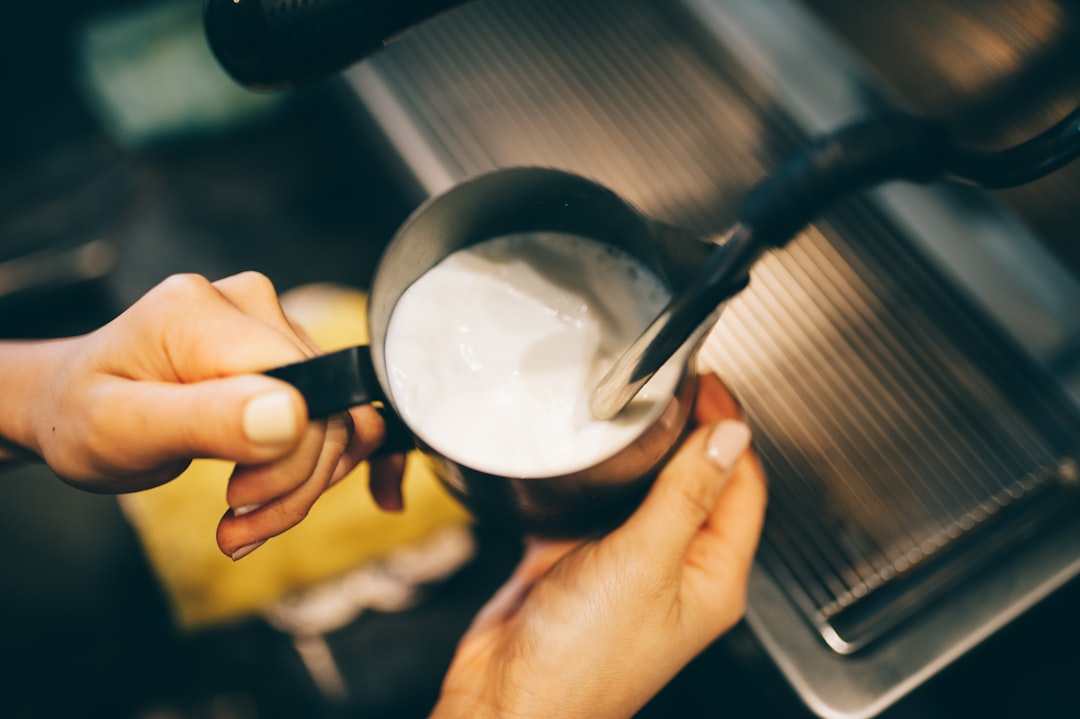
A Milk Frothing Pitcher
If lattes, cappuccinos, or flat whites are in your daily rotation, a proper frothing pitcher is essential. The stainless steel frothing pitcher I use cost about twelve dollars and has survived three years of daily use, dozens of dinner parties, and one memorable incident where my nephew decided to use it as a drum. Get a 12-ounce size — it’s perfect for one or two drinks and minimizes milk waste. The angled spout makes latte art genuinely possible, even for those of us (me) whose pouring technique is more “enthusiastic splash” than “delicate swan.”
The Upgrades You Can Make Later
Once you’ve been pulling shots for a few months, two upgrades are worth considering. A bottomless portafilter — which replaces the standard portafilter with an open design — lets you actually see your extraction and diagnose problems. Channeling, uneven flow, and tamping issues are invisible with a standard portafilter but painfully obvious with a naked one. It’s like having an x-ray for your espresso technique.
Upgrading your filter basket to a precision model (like IMS) gives you more uniform hole patterns and better flow. It’s a small change that produces noticeably better crema and extraction consistency. I swapped mine after about a year and immediately noticed richer, more golden shots.
Building Your Daily Ritual
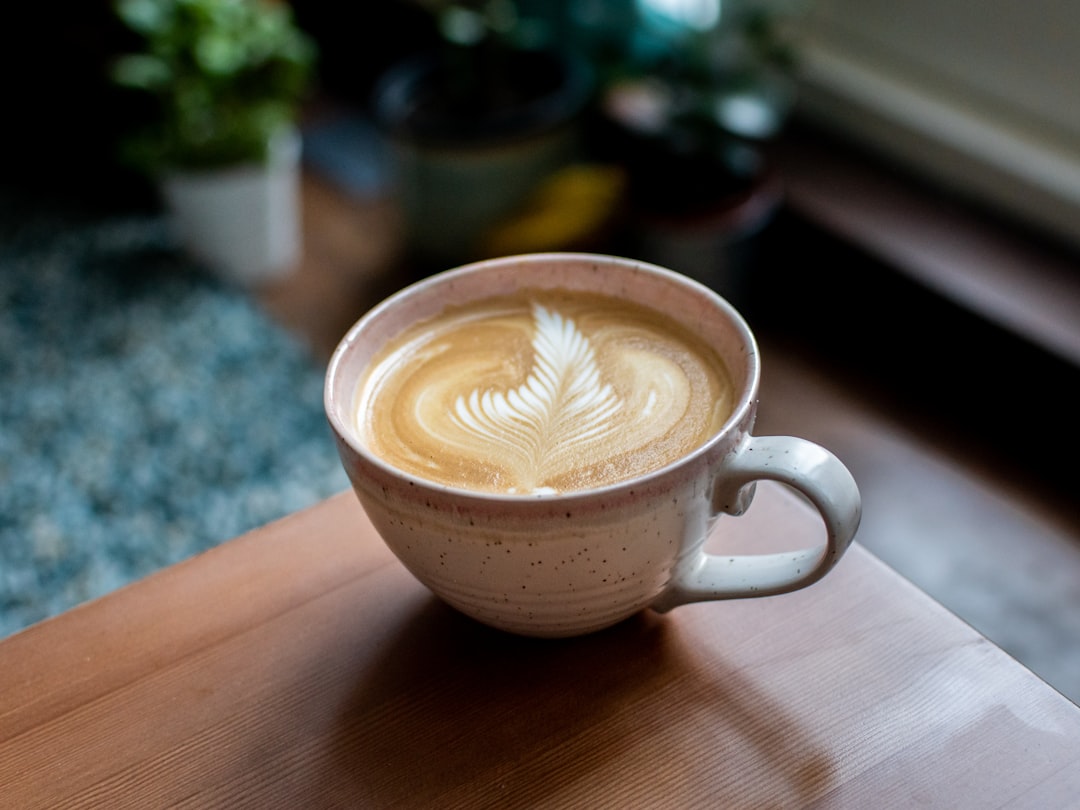
Here’s what nobody writes about in espresso gear reviews: the real magic isn’t in the crema or the microfoam or the perfect 1:2 brew ratio. It’s the ritual. Every morning, I walk into my kitchen, turn on the machine, and spend ten quiet minutes making something beautiful. No phone. No emails. Just the sound of the grinder, the hiss of the steam wand, and the first sip of something I made with my own hands.
My grandmother understood this. Her morning coffee wasn’t just about caffeine — it was the one part of her day that was entirely hers. She measured, she heated, she waited. It was a meditation disguised as a beverage. And she was right: when you make your own coffee, you start the day having already created something.
The financial math is compelling too. I was spending roughly $1,800 a year on café coffee. My entire setup — machine, grinder, tamper, scale, pitcher, accessories — cost about $900 total. It paid for itself in six months. Even factoring in quality beans (about $18 a pound, which lasts me two weeks), I’m saving over $1,300 a year. That’s a weekend trip. That’s a new stand mixer. That’s the entry-level budget for rethinking your whole countertop appliance strategy. If you already have your morning brew routine figured out, an espresso machine is the natural next step. And once you have one, it pairs beautifully with a summer beverage station — iced lattes pulled fresh, no drive-through required.
What I’d Buy If I Were Starting Today
If I were building my espresso corner from scratch — knowing everything I know now — here’s exactly what I’d do:
- Under $200 total: De’Longhi Stilosa + frothing pitcher + coffee scale. You’ll make better drinks than most cafés within a month.
- Under $700 total: Breville Barista Express + Normcore tamper + WDT tool. This is the sweet spot — serious espresso without needing a separate grinder.
- Spare no expense: De’Longhi La Specialista Opera + bottomless portafilter + IMS precision basket + Maestri House scale. This setup rivals professional equipment.
The Learning Curve Is Real (And Worth It)
Your first dozen shots will be inconsistent. Some will be brilliant. Some will taste like battery acid. This is normal. Espresso is a craft, and like any craft, it rewards patience and repetition. Keep a notebook (or just use your phone) and record your dose, yield, time, and taste for each shot. Within two weeks, you’ll see patterns. Within a month, you’ll have a dialled-in recipe that produces great coffee every time.
The thing I love most about home espresso is the same thing I love about cooking: it’s a skill that compounds. Every shot teaches you something. Every adjustment — a slightly finer grind, a half-gram more coffee, five seconds less extraction — is a step toward mastery. And unlike so many things in life, the results are immediate, tangible, and delicious.
If you’ve been on the fence, consider this your sign. Start small if you need to. A budget machine and a $12 pitcher will get you 80% of the way to café quality. The remaining 20% is where the joy lives — and it’s a wonderful rabbit hole to fall down.
Now if you’ll excuse me, my machine is heated up and there’s a shot with my name on it.