Why I Finally Ditched My Mismatched Container Mess (and You Should Too)
Last month, I stood in front of my pantry door staring at a catastrophic tumble of stained plastic containers, warped lids that no longer matched their bottoms, and a mysterious Tupperware orphanage that seemed to multiply overnight. Sound familiar? We’ve all been there—digging through a jumbled drawer at 6 AM, desperate to find that one matching lid while our lunch sits precariously on the counter. That morning was my breaking point. After years of tolerating this chaos, I decided it was time to invest in proper food storage containers that would actually work with my lifestyle, not against it.
What I discovered surprised me. The right food storage system isn’t just about neatness—it’s about keeping food fresh longer, reducing waste (I threw away $47 worth of wilted produce last month alone), and making meal prep infinitely more enjoyable. After testing dozens of options in my busy kitchen, I’m sharing the containers that have genuinely transformed how I store everything from Sunday meal prep to leftover lasagna. If you’re already meal prepping like a pro, these storage solutions will take your organization to the next level.
The Glass vs. Plastic Debate: What Actually Works Best
Let me be honest: I used to be a die-hard plastic container person. They were lightweight, seemingly unbreakable, and cheap. But after discovering stains from tomato sauce that wouldn’t budge, warping in the dishwasher, and growing concerns about heating plastics, I made the switch to glass. Here’s what I’ve learned: glass is worth the extra weight and upfront cost, especially for everyday meal prep and reheating.
That said, there’s absolutely still a place for high-quality plastic in my kitchen—particularly for freezer storage, kids’ lunches, and situations where weight matters. The key is choosing the right material for the right job. Let me walk you through exactly what I use and when, so you can build a system that works for your specific needs without oversizing your collection or your budget.
Glass Containers: The Workhorses of My Kitchen
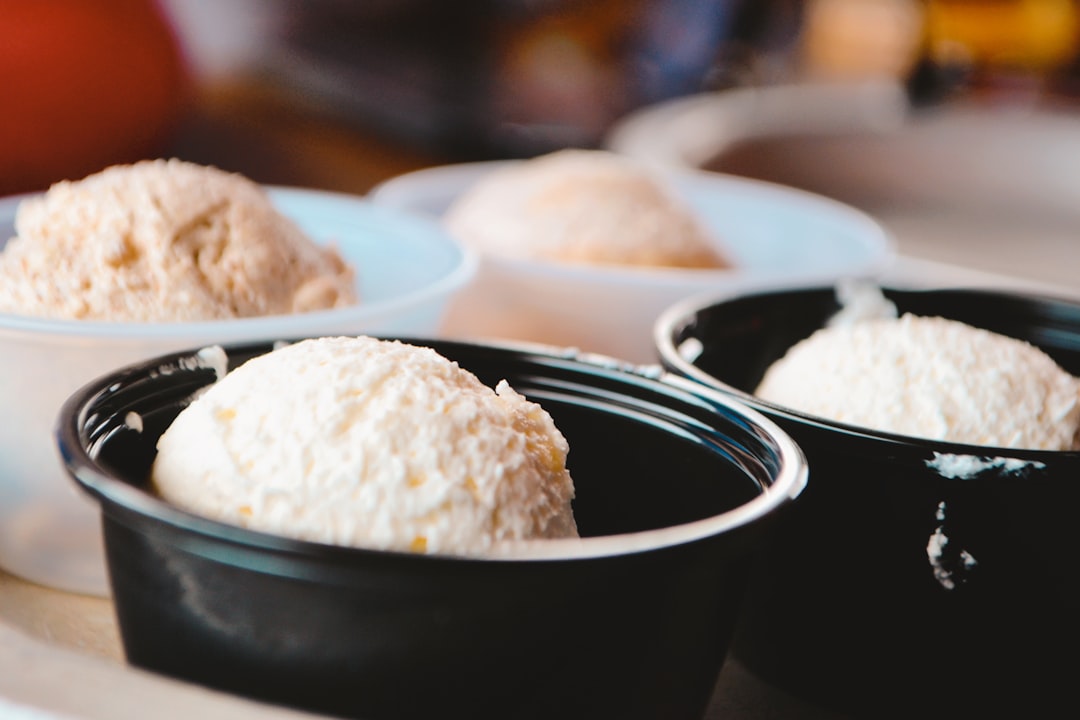
When I made the switch to glass, I started with Pyrex Freshlock glass containers, and they’ve become the backbone of my storage system. These borosilicate glass beauties have survived countless drops (yes, even my notorious butterfingers), transition seamlessly from fridge to microwave to oven (up to 450°F), and the locking lids create such a secure seal that I’ve accidentally stored soup on its side without a single drip.
What I love most about these is how they handle different types of food. Tomato-based sauces? No staining. Curries with vibrant turmeric? Zero absorption of odors or colors. And unlike plastic, they won’t warp in the dishwasher, even after hundreds of cycles. I particularly appreciate the variety of sizes available—from tiny 1-cup containers perfect for sauce portions to generous 6-cup rectangular containers that hold an entire layered salad without crushing delicate ingredients.
The downside? They’re heavier, which matters if you’re packing multiple containers for work or school. My husband initially complained about the weight in his lunch bag, but after his soups stayed hot and his crispy snacks stayed crisp, he became a convert. If you’re someone who packs multiple containers daily, you might want a lighter option (more on that below), but for home storage and reheating, glass is absolutely worth it.
The Unexpected Star: Snapware Total Solution
I discovered Snapware Total Solution when I was looking for containers with superior stacking ability for my crowded fridge, and they’ve exceeded my expectations. The four-tab locking system creates an airtight seal I can actually hear click into place, and the stacking grooves keep everything organized instead of sliding around. The rectangular shape maximizes fridge space, and the shallow 2-cup size is perfect for storing leftovers that reheat beautifully in the same container.
Plastic That’s Actually Worth It: Vtopmart Airtight Canisters
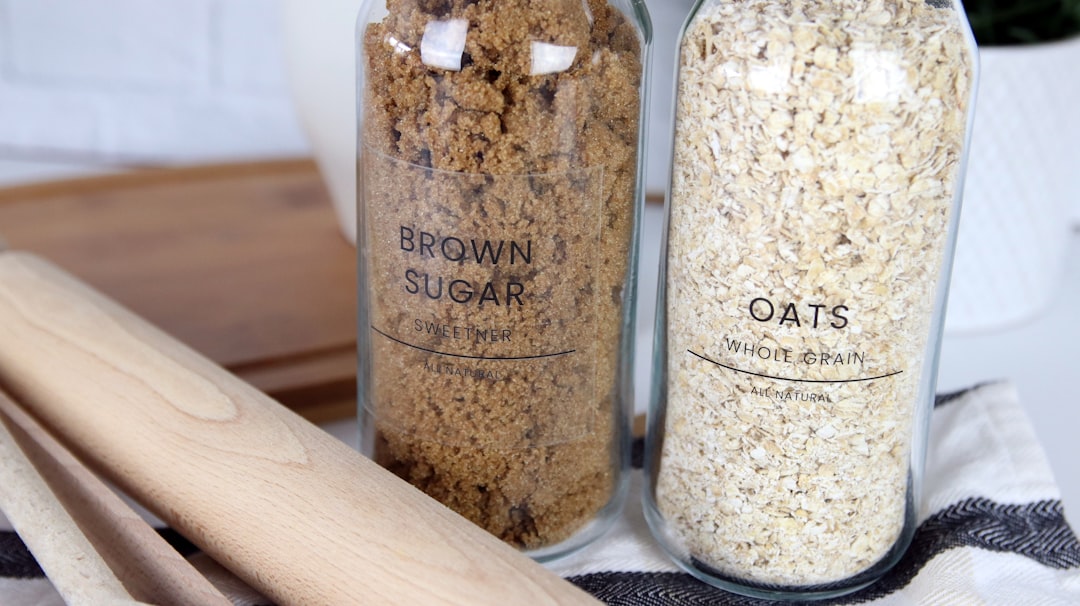
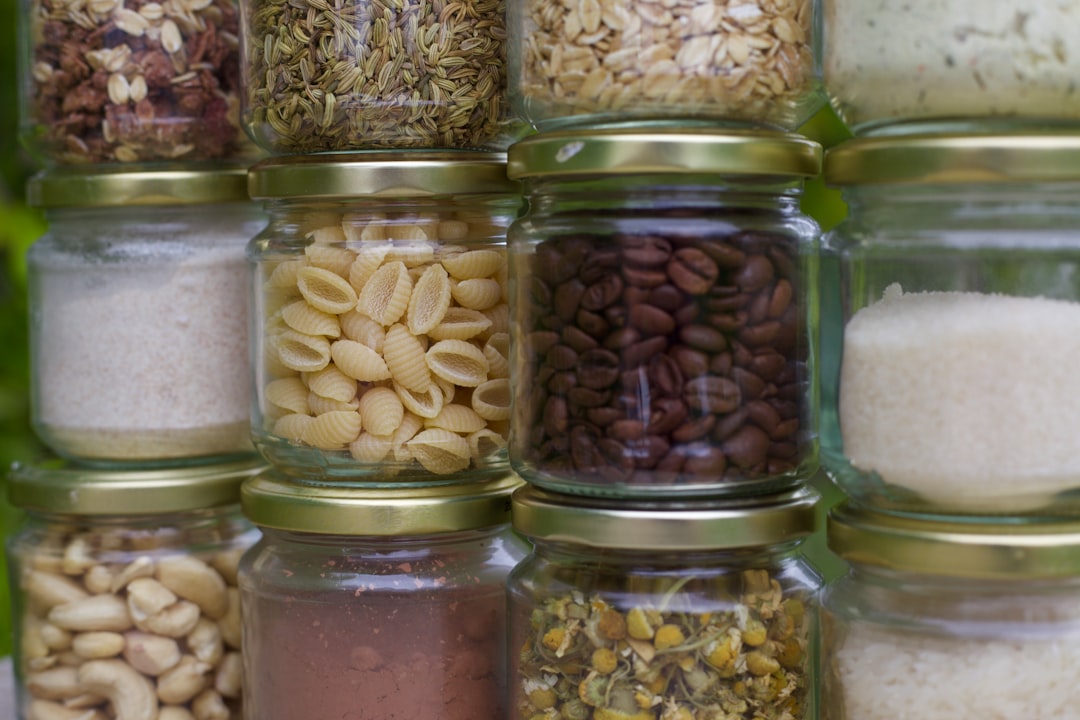
Let me be clear: I’m selective about plastic in my kitchen. But Vtopmart’s airtight food storage canisters have earned a permanent place in my pantry, and here’s why they’re different from the flimsy plastic containers we’re all trying to replace. These thick, BPA-free plastic containers are designed specifically for dry goods—flour, sugar, pasta, cereal, snacks—and the four-sided locking lids with silicone gaskets create such an effective seal that I’ve literally forgotten about a bag of brown sugar for six months and found it still soft and fresh when I finally rediscovered it in the back of the pantry.
The 24-piece set includes various sizes that have transformed my pantry from chaos to organized bliss. The tall canisters perfectly hold spaghetti and lasagna noodles without breakage, the medium sizes are ideal for my collection of odd-shaped pasta and bulk grains, and the small ones keep my spice packets and baking supplies from disappearing into the dark corners of cabinets. What I didn’t expect but absolutely love is how the clear design lets me see exactly what’s inside at a glance—no more unlabeled mystery containers or opening five different jars to find the baking powder.
The set even comes with reusable chalkboard labels and a marker, which I initially dismissed as gimmicky until I realized how genuinely useful they are for tracking expiration dates and distinguishing between different types of flour (all-purpose vs. bread vs. whole wheat). These aren’t microwave-safe (they’re designed for pantry storage, not reheating), but for organizing dry goods and keeping staples fresh, they’re unbeatable.
Silicone Storage: The Flexible Game-Changer
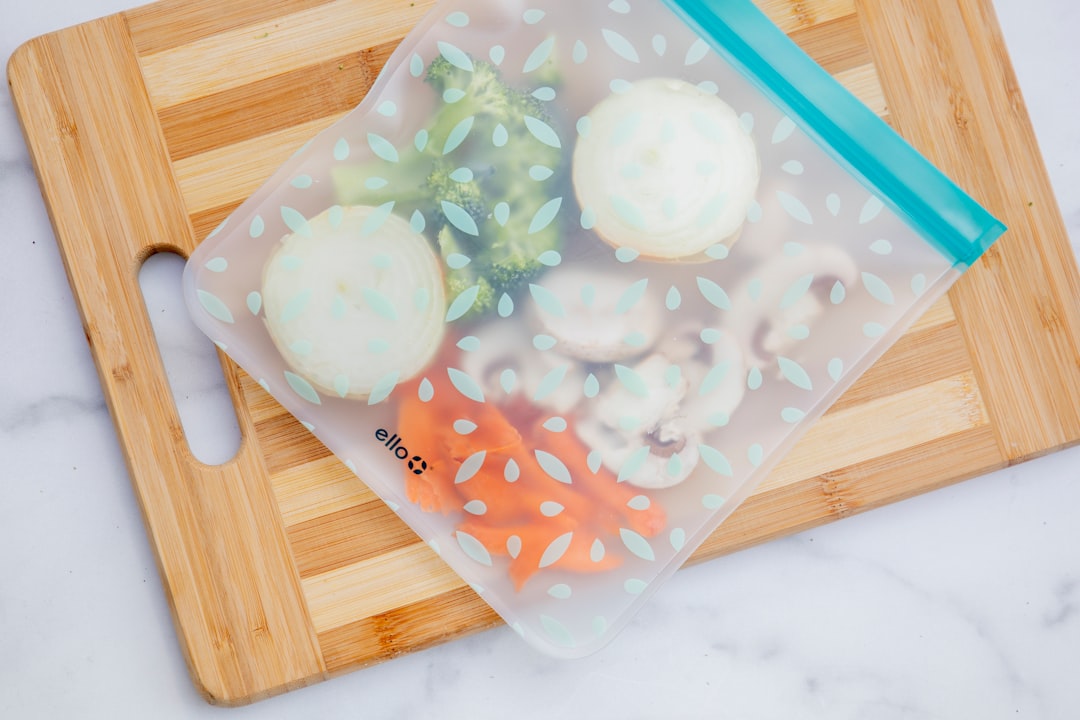
I’ll admit I was skeptical when I first tried reusable silicone food storage bags. Could they possibly replace disposable plastic bags? After six months of daily use, these have eliminated my single-use plastic bag habit completely. They’re incredibly versatile—perfect for marinating, storing cut vegetables, and packing sandwiches. They’re freezer-safe, microwave-safe, and the stand-up design makes filling effortless. They can retain odors from strong foods, but a quick baking soda soak solves that. For snacks, sandwiches, and portioned leftovers, these are indispensable.
Stainless Steel: The Heavy-Duty Champion
For durable storage that handles rough-and-tumble situations, I invested in stainless steel food containers. These lightweight but rugged containers are perfect for camping trips, school lunches, and situations where glass might be risky. The leakproof locking lids have survived being dropped, tossed in backpacks, and worse. Stainless steel won’t stain, absorb odors, or leach chemicals, making them ideal for acidic foods. You can’t microwave them directly, but for durability and safety—especially for kids’ lunches and outdoor adventures—these are absolutely worth the investment.
Specialty Containers That Solve Specific Problems
Beyond the basics, I’ve discovered some specialty containers that solve particular kitchen headaches so well that I can’t imagine going back to my old methods. For anyone who meal preps or packs lunches daily, these might be game-changers for you too.
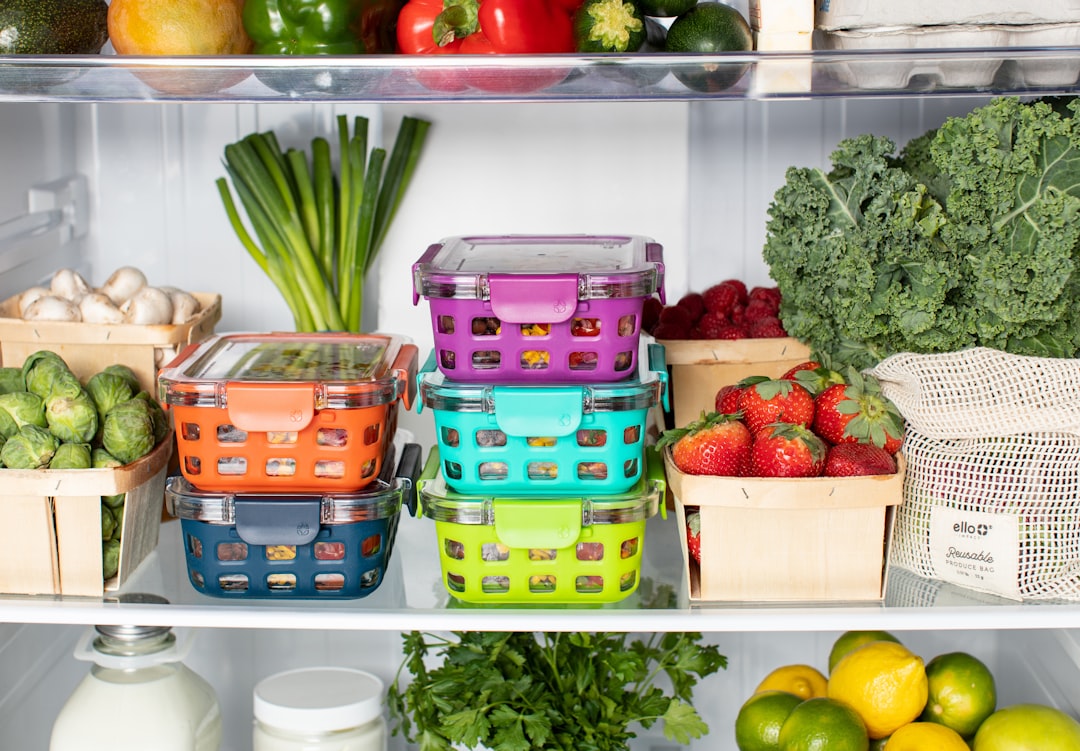
Bento-style lunch containers have revolutionized how I pack weekday lunches. The compartments keep different foods from touching (crucial for my husband, who dramatically complains about “contaminated” textures), and portion control is automatic—no more oversized lunch portions leaving me sluggish at 2 PM. The particular set I chose has removable dividers, so I can customize compartment sizes based on what I’m packing, and the leakproof seals mean I can include dressings and sauces without worry.
For breakfast lovers (and who isn’t?), overnight oats containers might seem unnecessarily specific until you realize how perfectly they solve the messy mornings problem. These compact jars with leakproof lids let me prep five days of breakfast in under 15 minutes—no more cooking, no more dishes, just grab from the fridge and go. I’ve also found them perfect for parfait ingredients, yogurt snacks, and even individual portions of pudding or mousse for dessert.
And if you’re someone who buys in bulk (which I highly recommend for both economy and reducing packaging waste), large-capacity storage containers are essential. The 5-pound capacity containers I use for flour, sugar, and rice have transformed my pantry organization and keep staples fresh for months instead of weeks. Look for containers with wide mouths for easy scooping and measurements marked on the side for convenient baking.
What to Look for When Choosing Your Containers
After testing dozens of options, here’s what I consider essential before adding anything to my kitchen:
Leakproof sealing: Non-negotiable. I test containers by filling them with water and shaking vigorously—if there’s a single drop, it doesn’t come home. Locking lids with silicone gaskets create the best seals, especially for soups and sauces.
Stackability and nesting: Fridge space is precious. Look for containers that stack securely and nest when empty. Grooved lids that interlock keep everything organized instead of sliding around.
Temperature versatility: Can it go from freezer to microwave to dishwasher? Glass generally wins here, but quality plastics and silicone options can be surprisingly versatile too.
Material safety: I look for BPA-free, phthalate-free materials that won’t leach chemicals, especially when heated. Glass and stainless steel are inherently safe, but if you prefer plastic, verify it’s high-quality and designed for food storage.
Practical sizing: Avoid sets with too many tiny containers. My ideal collection includes multiple 1-2 cup containers for sauces, several 3-4 cup containers for main dishes, and a few 5-6 cup containers for batch cooking.
Building Your Container Collection Strategically
Here’s where I see many people go wrong: they buy a massive container set all at once, end up with half the sizes they never use, and still don’t have enough of the sizes they need daily. After years of trial and error, I recommend building your collection strategically based on your actual cooking and storage habits.
Start with the basics: invest in 6-8 high-quality glass containers in the 2-4 cup range. These will handle 80% of your storage needs—leftovers, meal prep components, sauces, sides. Add a few larger 5-6 cup containers for batch cooking and whole meals. If you pack daily lunches, consider 4-6 smaller 1-cup containers for portion control and variety.
Next, address your specific pain points. Do you meal prep breakfast? Overnight oats containers will pay for themselves in time saved. Do you buy in bulk? Large-capacity canisters for staples will keep your pantry organized and food fresh. Do you pack school lunches? Bento boxes or durable stainless steel might be your best investment.
Finally, fill in with specialty containers only after identifying genuine needs. I know it’s tempting to buy that adorable avocado-specific storage container (I’ve been there), but if you only cut avocados twice a month, a standard container will work just fine and save you money and storage space.
Real-Life Organization Tips That Actually Stick
Having the right containers is only half the battle—organizing them so they’re usable is equally important. After years of frustrating systems, here’s what finally stuck:
Store lids separately from bottoms: Keeping a dedicated drawer for all lids (organized by size) and stacking only the bottoms has eliminated the desperate lid-searching dance. I use a simple divider to separate small, medium, and large lids.
Create zones based on use frequency: My most-used containers (2-4 cup glass ones) live at eye level. Specialty and seasonal containers live on higher shelves. This simple adjustment reduced my daily container-fishing time dramatically.
Use clear labeling systems: Labels save endless opening and checking. I use washable chalk markers on glass containers to note contents and dates, especially for freezer items.
Establish a regular purge routine: Every three months, I assess whether all containers are still being used. Unused items get donated or repurposed, preventing accumulation and keeping my collection streamlined.
Maintenance and Care: Making Your Investment Last
Good food storage containers are an investment, and proper care ensures they’ll last for years. Here’s what I’ve learned:
Glass containers: Inspect regularly for chips or cracks, especially around rims. Avoid extreme temperature changes—don’t transfer from freezer to hot oven. Hand-wash lids to extend their lifespan, especially the silicone seals.
Plastic containers: Even BPA-free plastics can degrade with repeated microwave heating. Replace every 12-18 months with heavy use, sooner if you notice warping, deep staining, or persistent odors.
Silicone bags: Use wooden or silicone utensils and soft sponges. For stubborn odors, a paste of baking soda and lemon juice works wonders. Avoid direct stovetop flames.
Stainless steel: Nearly indestructible but can scratch from abrasive cleaning. Use soft cloths and mild detergent. Check if manufacturers sell replacement lids before replacing the entire container.
The Bottom Line: What’s Actually Worth Your Money
After testing dozens of containers and living with them daily, here’s what’s genuinely worth investing in:
If you can only afford one upgrade: Start with a set of 6-8 glass containers in 2-4 cup sizes with locking lids. This eliminates 80% of storage frustrations and handles most needs.
If you meal prep regularly: Add larger 5-6 cup containers for batch cooking and bento-style lunch containers for daily portions.
If you have a busy pantry: Invest in airtight canisters for dry goods. The transformation in freshness and organization alone is worth the cost. These pair beautifully with the pantry organization systems I covered in a previous article.
If you want to reduce single-use plastics: Reusable silicone bags eliminate the most common single-use items and replace dozens of disposable bags per week.
Getting Started Without Breaking the Bank
I know upgrading your entire container collection at once feels overwhelming (and expensive!). Here’s how I recommend transitioning gradually without budget shock:
Month 1: Replace the containers you use most frequently with glass options. This is usually 6-8 pieces in the 2-4 cup range. Notice the difference immediately in reheating quality and food freshness. These containers work perfectly alongside other essential kitchen gadgets under $50 that streamline your cooking workflow.
Month 2: Add pantry storage canisters for your most-used staples (flour, sugar, pasta, cereal). Watch your pantry transform from chaos to organized while keeping food fresh longer.
Month 3: Add specialty containers based on your specific needs (lunch containers, silicone bags, or large-format containers for batch cooking). By now, you’ll have a clear sense of what would be most useful.
Beyond: Gradually replace remaining worn or mismatched containers as budget allows, focusing on quality over quantity. Six excellent containers that you actually use are better than twenty mediocre ones that mostly sit empty.
The investment in quality food storage containers might seem indulgent until you experience the difference it makes in daily kitchen life. Less wasted food, easier meal prep, more organized spaces, and the simple pleasure of opening the fridge to see neat, fresh, properly stored food instead of jumbled chaos. It’s one of those upgrades that seems small but has outsized impact on how enjoyable and efficient your kitchen feels to work in every single day.
So take it from someone who spent years tolerating a chaotic container collection that made meal prep miserable: making the switch to proper food storage is absolutely worth it. Your future self, opening an organized fridge at 6 AM to grab a perfectly portioned, freshly stored lunch, will thank you profusely.

One thought on “Best Food Storage Containers for 2026: Complete Guide to Keeping Food Fresh Longer”